
Hello and welcome! This tutorial marks the beginning of our journey into the world of Google Analytics 4 (GA4) and BigQuery. We’ll begin by walking you through the process of configuring the BigQuery integration within your GA4 property. Are you ready to embark on this exciting journey? Let’s dive right in.
This is part 1 of 10 in our series, “Get Started with the GA4 BigQuery Export”. Check out the course overview for a full list of all the topics covered.
Introduction
For many individuals, the first step in harnessing the great potential of the GA4 BigQuery export involves setting up the integration. While it may not be as simple as just clicking a few buttons within Google Analytics, fortunately, the process is straightforward and not overly complex.
To get started, there are two main prerequisites: First, you need a Google Analytics (GA4) property that is actively processing data. Second, you’ll need a Google Cloud Platform (GCP) project configured to receive this data.
The steps below will guide you through the process but should you get stuck at any point then you can also refer to the official documentation for more detailed instructions and troubleshooting tips.
Google Cloud configuration
Before you can enable the BigQuery integration within Google Analytics, you’ll first need to prepare your Google Cloud project to receive the data. Follow the steps below to complete the configuration steps in GCP.
1. Sign in to your Google Cloud account, or create a new account if you haven’t already done so. Although you will be asked to provide credit/debit card details when signing up, you’ll have 90 days (and $300 of credit) to use the platform for free.
You can setup the export using BigQuery in “Sandbox” mode, which means you won’t face any potential costs but your tables will then automatically expire after 60 days. To avoid this happening you will need to enable billing (and then manually remove the table expiry for any tables exported whilst in Sandbox mode).
Even after the trial period concludes and you have enabled billing, you’ll continue to enjoy the benefits of up to 10 GB of BigQuery storage and up to 1 TB of free queries every month.
These allowances should put your mind at ease, especially if you manage a small website or app. In most cases, it’s more than sufficient to ensure you won’t incur any charges at all. The GA4 BigQuery integration can seamlessly support your data analytics needs without breaking the bank.
If you are worried about what costs might be incurred use our free BigQuery cost calculator to estimate storage costs based on expected daily event volumes.
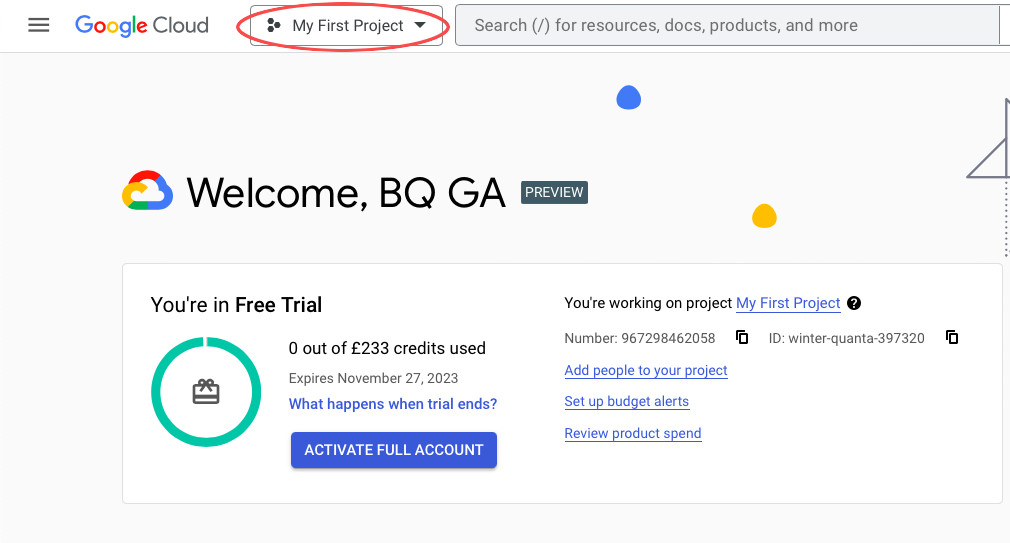
2. After you have completed the registration process you will be taken to the Google Cloud homepage. From here, click on the drop-down menu at the top of the screen and in the popup that appears click NEW PROJECT.
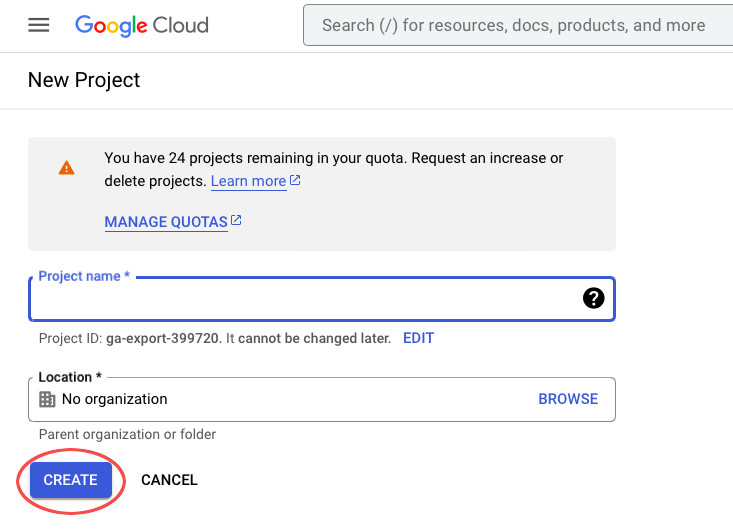
3. Give your project a name and then click CREATE.
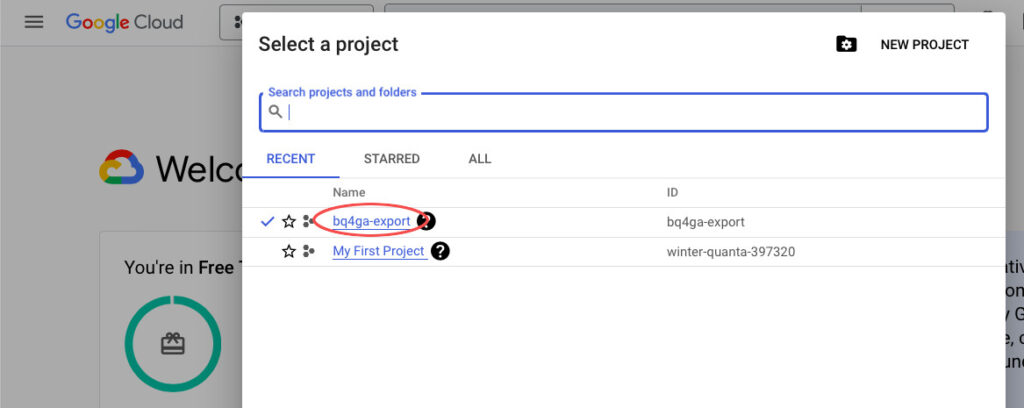
4. Once the project has been created, click the drop-down menu at the top of the screen again and click on your new project to select it.
5. Open the menu and select APIs & Services then Library.
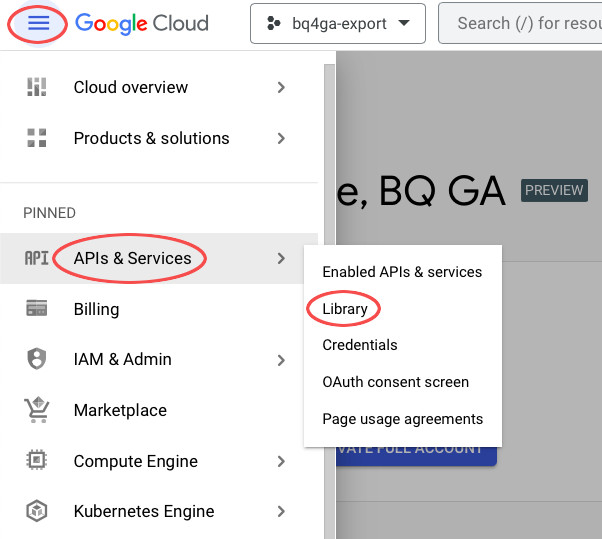
6. Search for “bigquery api” and then select the BigQuery API option.
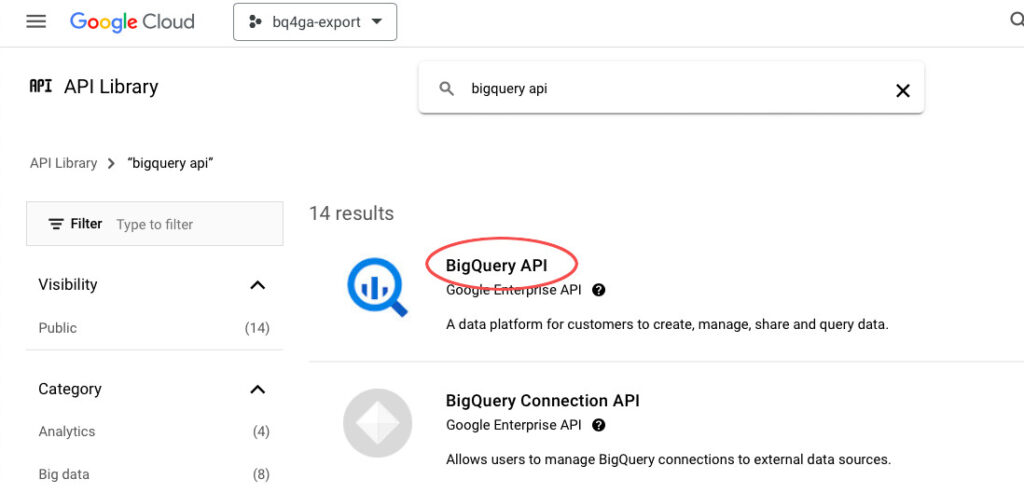
7. Check that it says “API Enabled”. If instead you see an ENABLE button then click that to enable the API.

That’s it! Your GCP project is now ready to receive data from Google Analytics.
Google Analytics configuration
You can now make your way over to Google Analytics and follow the below steps to enable the BigQuery integration.
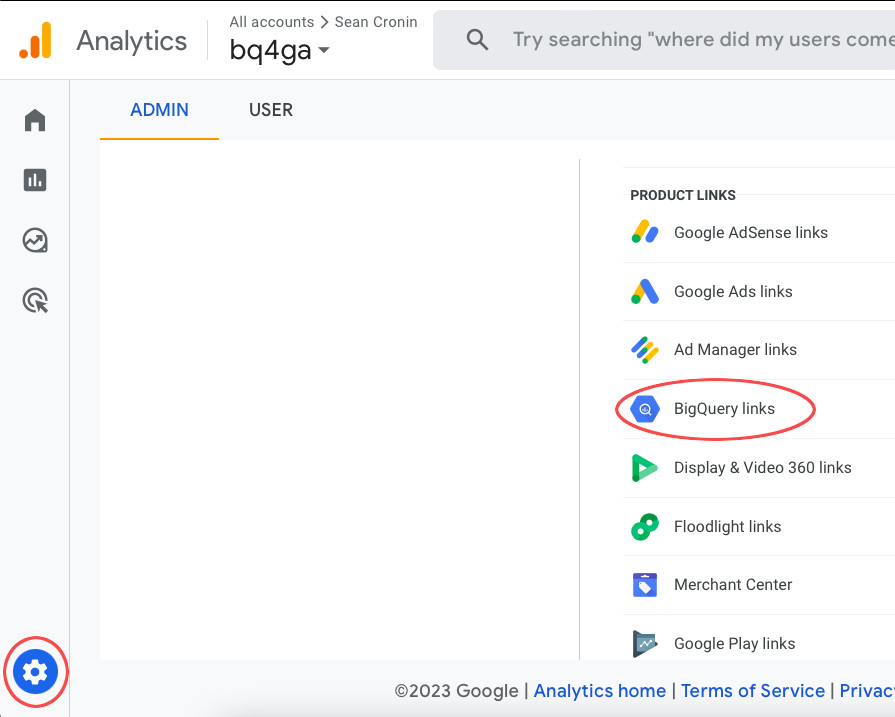
1. From within the Admin area, select BigQuery links under the Property settings.
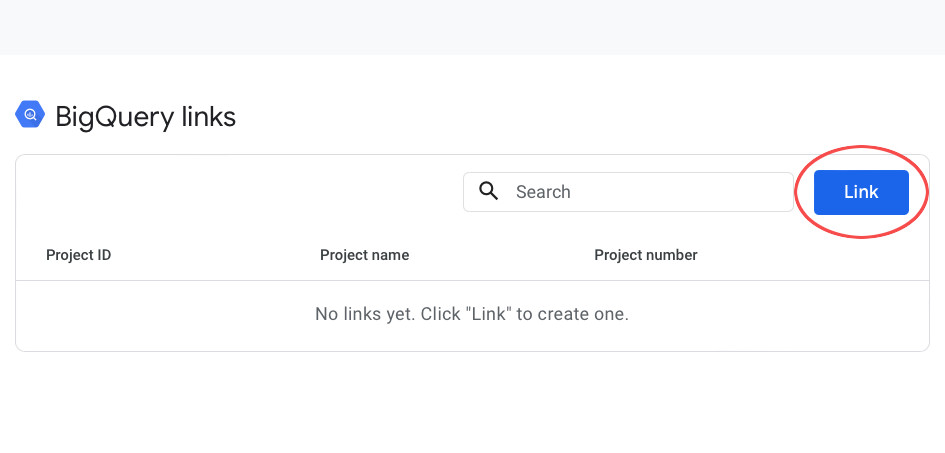
2. Click Link to begin the linking process.
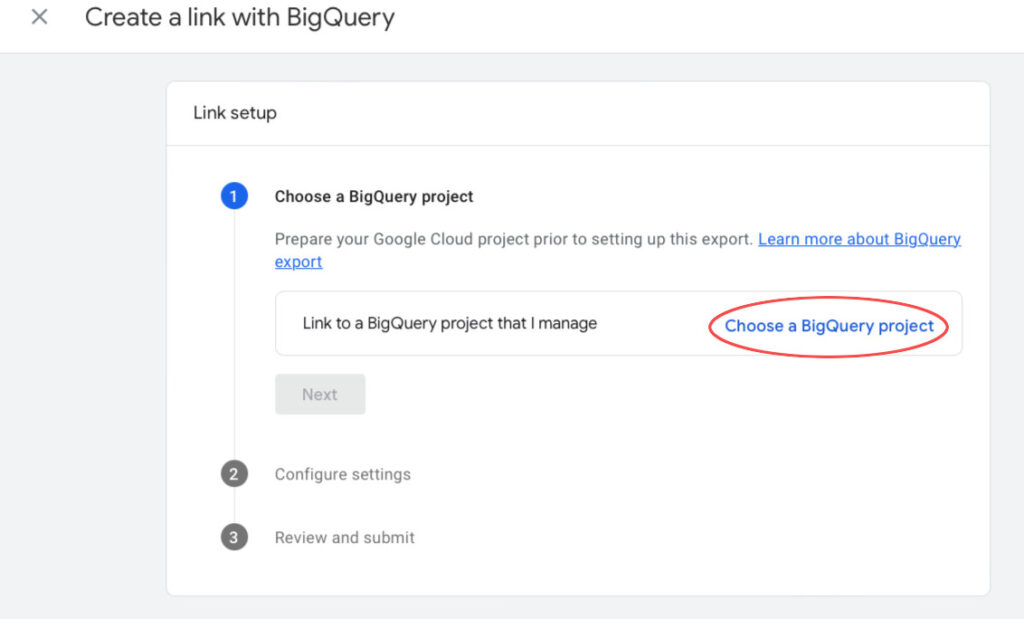
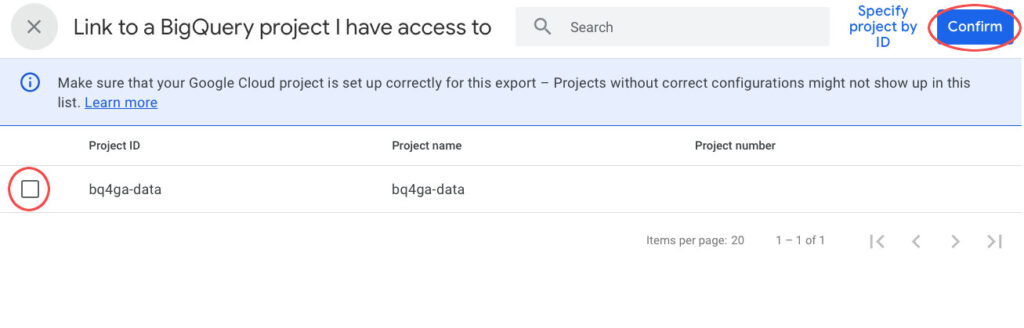
3. On the next screen, click Choose a BigQuery project.
4. Select the project you just created in GCP and then click Confirm.
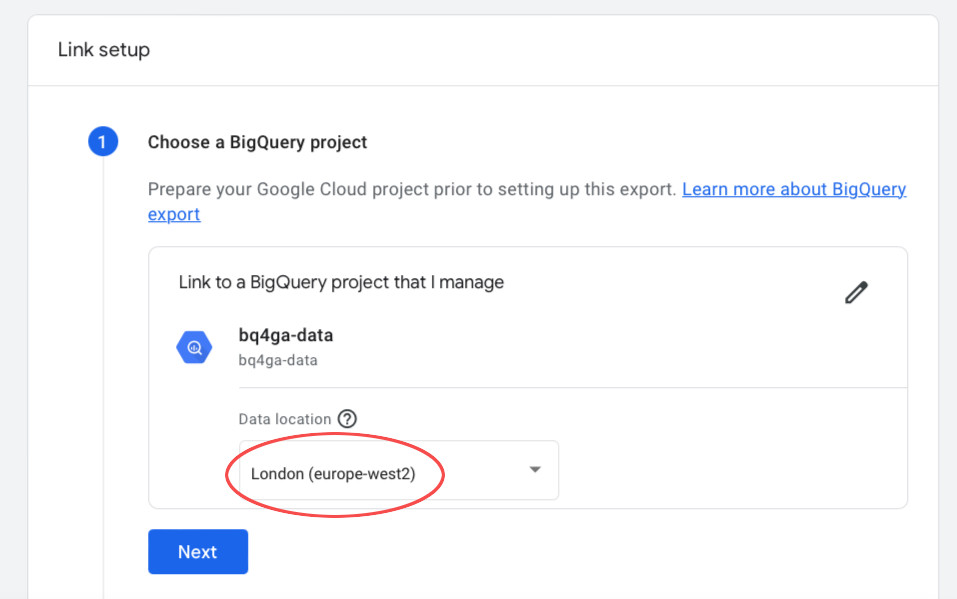
4. Then choose a location for your data and click Next. You can choose any location you wish but it probably makes most sense to store your data in the same location as your website/business is physically based.
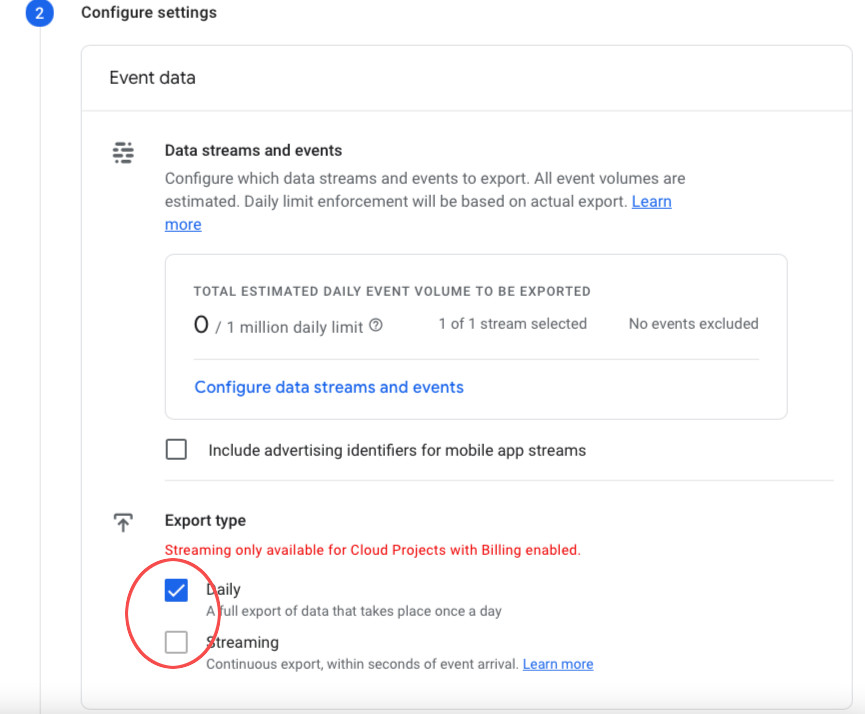
5. On the next step, click Configure data streams and events.
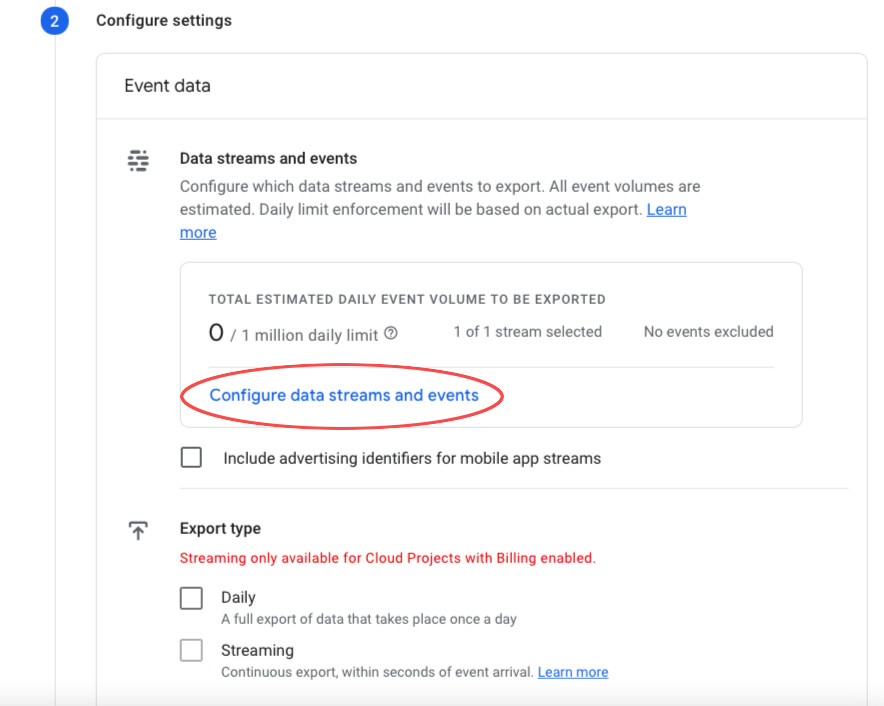
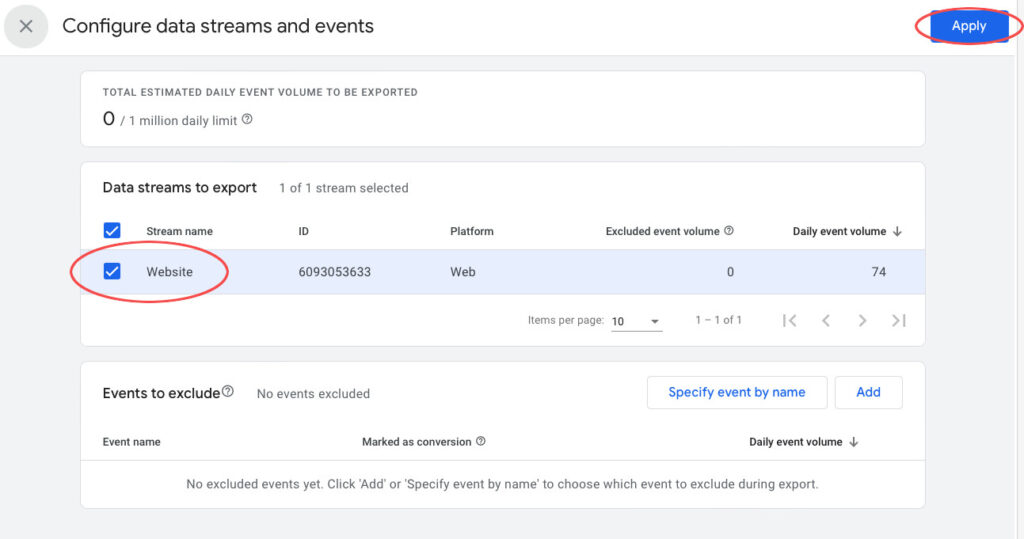
6. Select the data stream(s) you want to include in the export and then click Apply. Optionally, you can also select any events you want to exclude from the export here too.
7. Next you will select the export type that you want to enable. Choose Daily to export a new table on a daily basis and/or Streaming to have data exported in realtime.
You must have enabled billing in GCP to be able to select the streaming export. Also note that streaming tables only last for around 24-36 hours so if you choose this option then it’s also recommended to configure the daily export in order to maintain a full history of your data.
We’ll talk more about the daily and streaming exports in tutorial 3.
8. You can now also enable the User data export too. This is a completely separate type of export to the Events data that has only just been released in August 2023.
We won’t cover it in this course, but feel free to enable it here if you want to explore the data yourself.
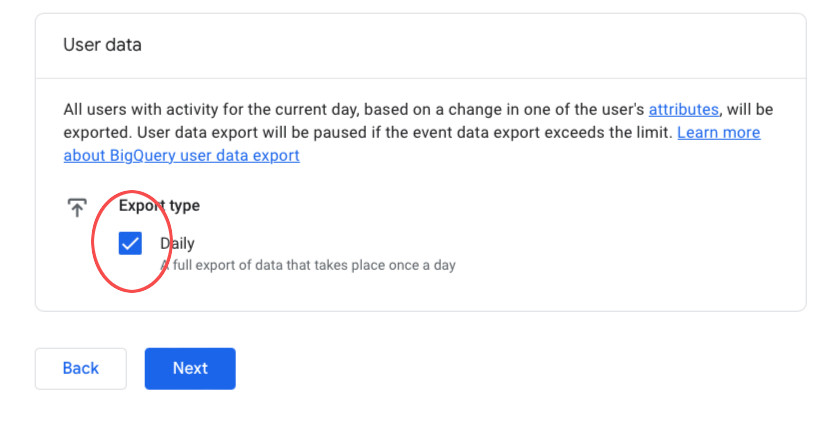
9. Once you have competed all options, click Next and then Submit to configure the export. You should see a message saying “Link Created”.
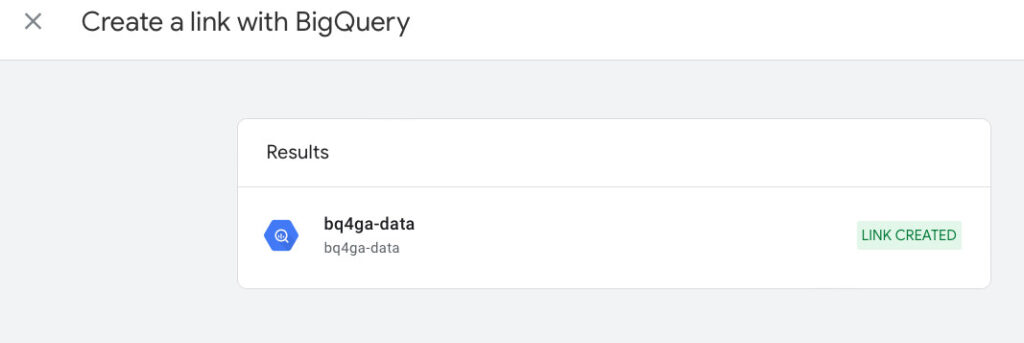
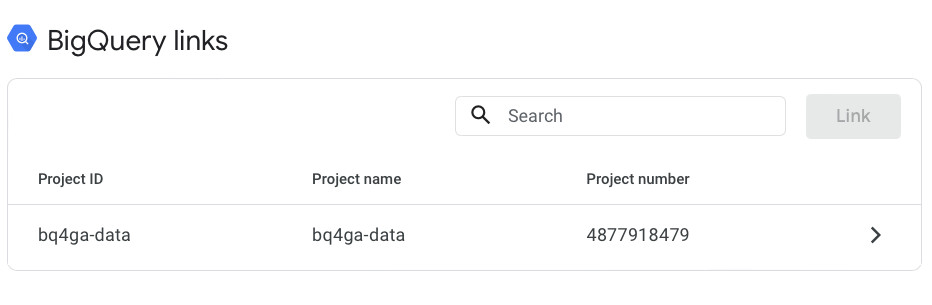
10. Click (X) to return to the BigQuery links screen and you should now see your project listed.
Verify service accounts
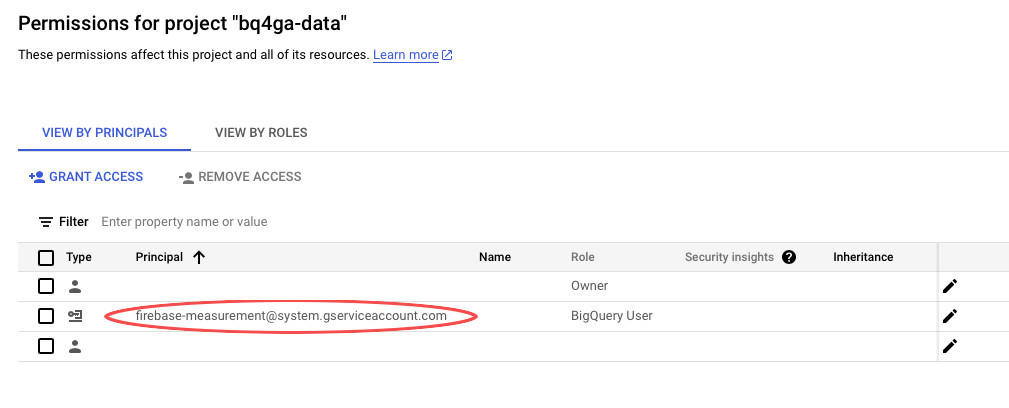
When you create the link to BigQuery, a service account called firebase-measurement@system.gserviceaccount.com will be created in your GCP project.
1. To verify that this has happened as expected, go back to GCP and select IAM & Admin from the main navigation menu.
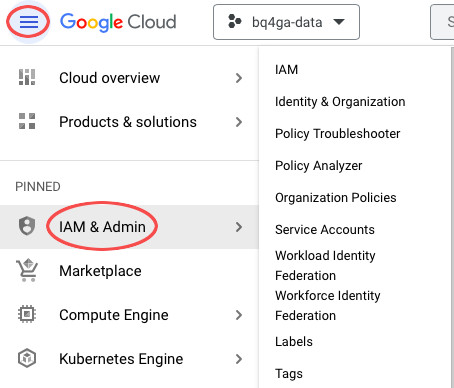
2. You should see this new user listed with the role of “BigQuery User”.
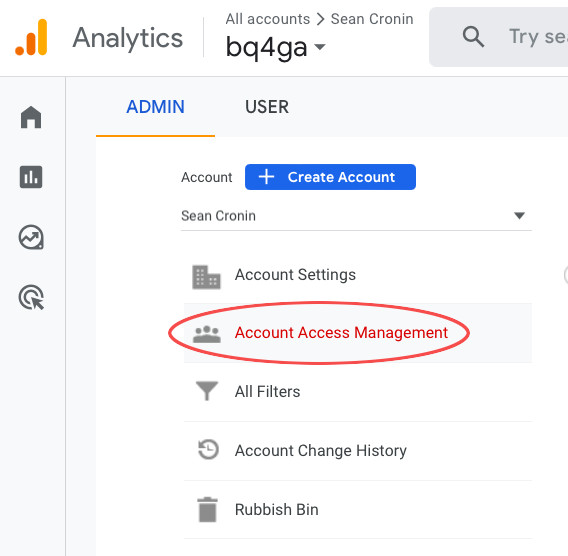
3. You should also find that some new users have been added to your Google Analytics account. If you go back to the GA4 admin area and select Account Access Management then you should see a number of new “Firebase project” users listed there.
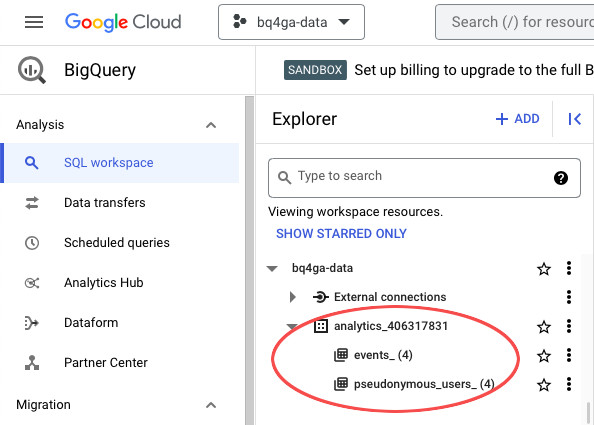
Verify export
You’ll need to wait a while before any data appears in your BigQuery project, but after a day or so you should find that a new dataset has been created, and within that an events table (assuming you enabled the “Event data” export) and/or a pseudonymous_users table if you enabled the “User data” export.
1. To check this, go back to GCP and use the search bar at the top, or the main navigation menu to select BigQuery.
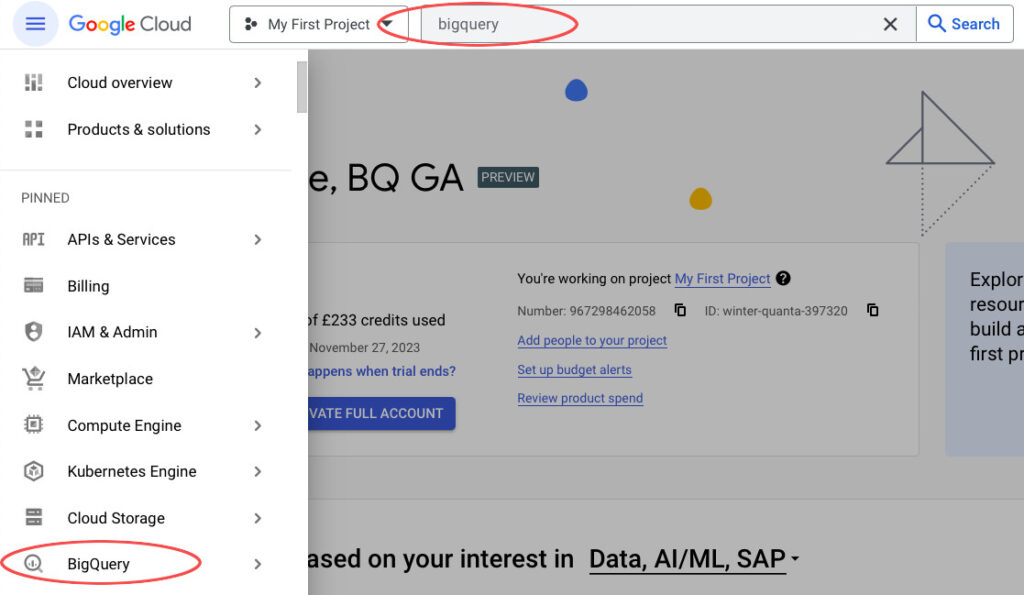
2. When the BigQuery screen loads, you should see your new project listed in the Explorer pane, and if you click on the arrow to open it should find a dataset with one or more tables listed underneath.
Wrapping up
That’s it! You’ve successfully enabled the BigQuery export for your GA4 property. Now you’re ready to dive into the world of data analysis, reporting, and visualization using the powerful capabilities of BigQuery.
If you want to start exploring the export now, without waiting for your data to appear, then continue to tutorial 2 where we’ll show you how to connect to the sample datasets provided by Google.
If you are happy to wait, or if your data is already available in BigQuery, then feel free to jump ahead to tutorial 3, where we will provide an overview of the structure of the exported data.